

Making your own podcast is not as scary as it sounds. All you need is something to record your voice with (your phone or computer will do just nicely), some editing software, and a lot of patience.
1. Get the software
Audacity is free and perfectly adequate for making a decent podcast. Click on the link, then hit the big button that says, “Download Audacity” and follow the instructions to install. https://www.audacityteam.org/

2. Make a recording.
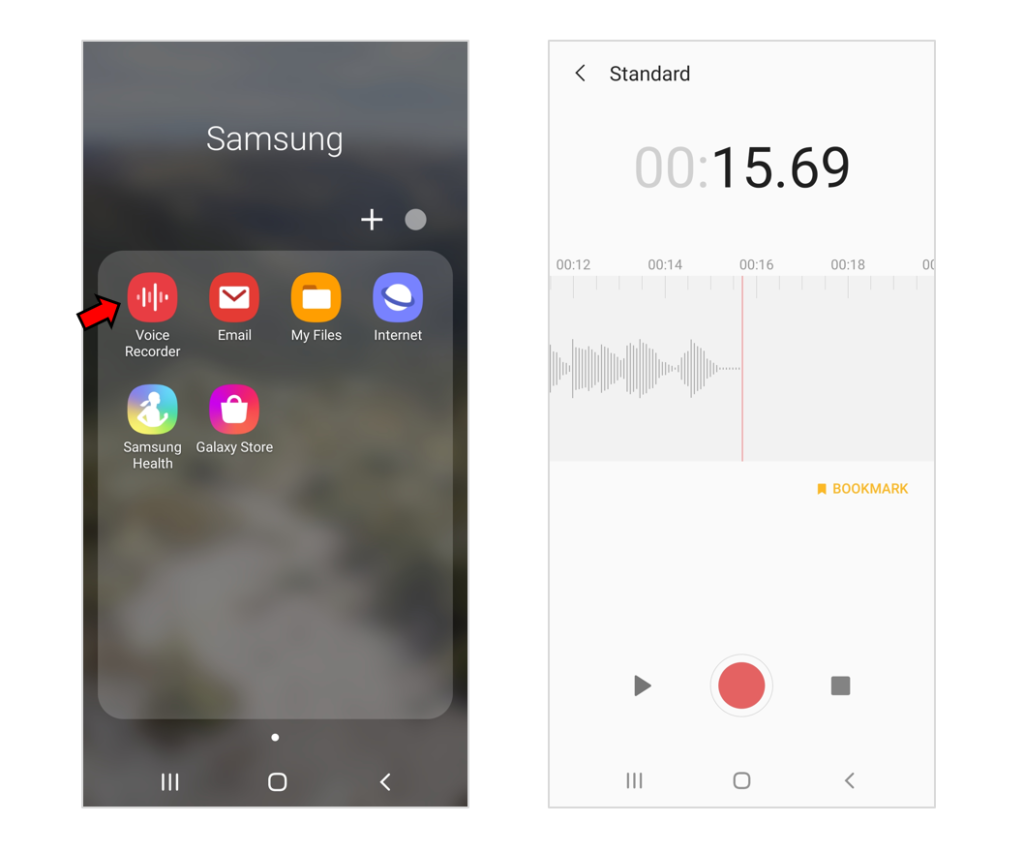
I find the easiest way is to use the voice recorder on my phone. Most phones have one, or you can download a voice recorder app (don’t pay for one, there are plenty available free).
The other option is to record straight into Audacity. Click on the Record button, and away you go!
3. Save your recording
If you recorded on your phone, you will have the option to save the file. Give the file an obvious name and save it somewhere you will be able to find it.
If you chose to record on audacity, your audio will already be in the programme, but you might want to save it as a file so you can use it more than once when you edit. To do this, go to File>Export>Export as MP3 (or WAV, either is fine).
Again, give it an obvious name and save it somewhere you will be able to find it easily.

4. Get the audio into Audacity.
If you recorded on your phone, you will need to get the file onto your computer. There is a heap of ways you can do this:
- Email it to yourself
- Upload it to your Google Drive
- Bluetooth
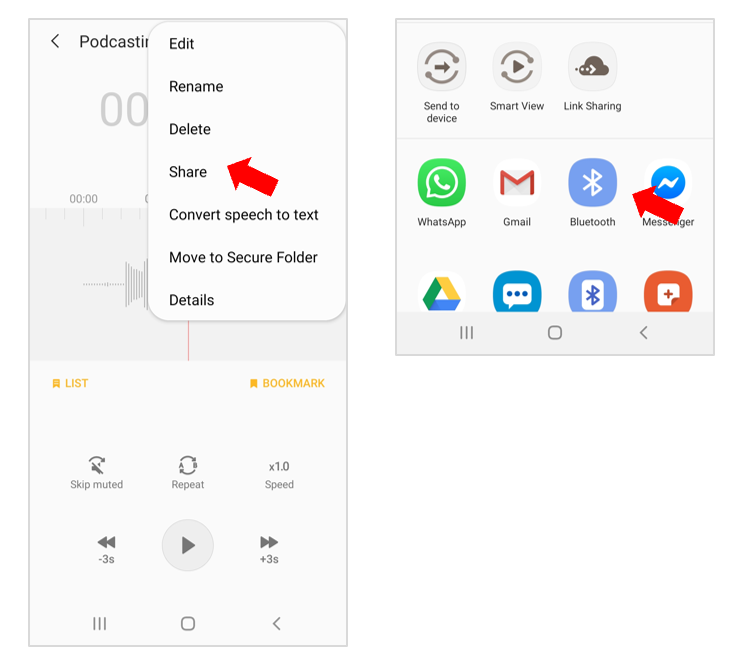
My favourite option is Bluetooth – you can save it to exactly where you want it without having to clutter up your inbox.
Find the share option on your phone, prepare your computer to receive a file, and choose Bluetooth for your sharing option. (Note: you have to have your computer ready to receive before sharing from your phone).
Again, save it somewhere obvious and you’re ready to go.
Open Audacity and choose File>Import>Audio
Choose your file.
If your file from your phone is .m4a, you will get these messages:
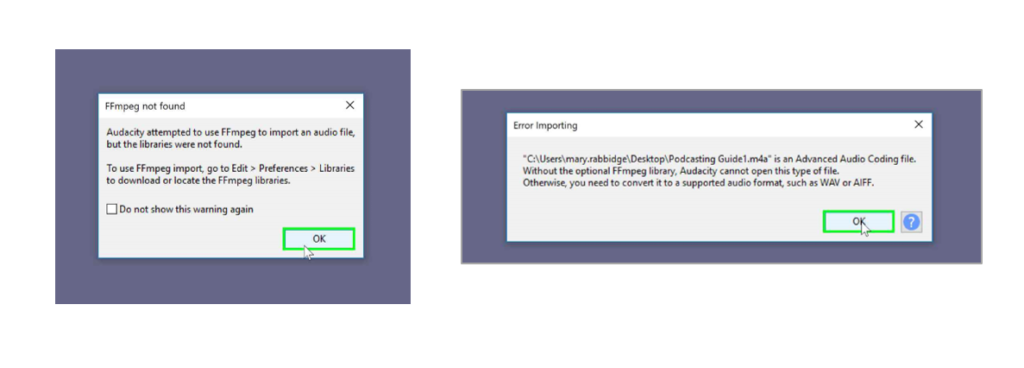
Don’t freak out. This just means you need to convert your file to something Audacity can work with. Click on this link https://www.online-convert.com/ then follow these steps:
- Choose “Audio converter”
- There are a lot of options, go for AIFF (this is one of the formats suggested in the above message from Audacity).
- Choose your file.
- Start the conversion. Once that’s done, download it.
- The easiest way to save it from here is to click on the arrow next to the file and find it in your downloads. From there, you can move it to the folder you want to save it in.
- Now, repeat the Import>Audio process from above and you’re underway.
5. Edit
Now we’re ready for the fun stuff. Once your file is imported into Audacity, you can start to make it awesome. Audacity has a lot of features to play with and the Quick Help guide (under Help) has heaps of advice on how to use the programme and what each tool does. For this reason, I’ll stick to the basics. This is what your screen will look like once you have imported your audio (you may have one or two lines for this, it depends on whether you recorded in Mono or Stereo – it doesn’t matter):
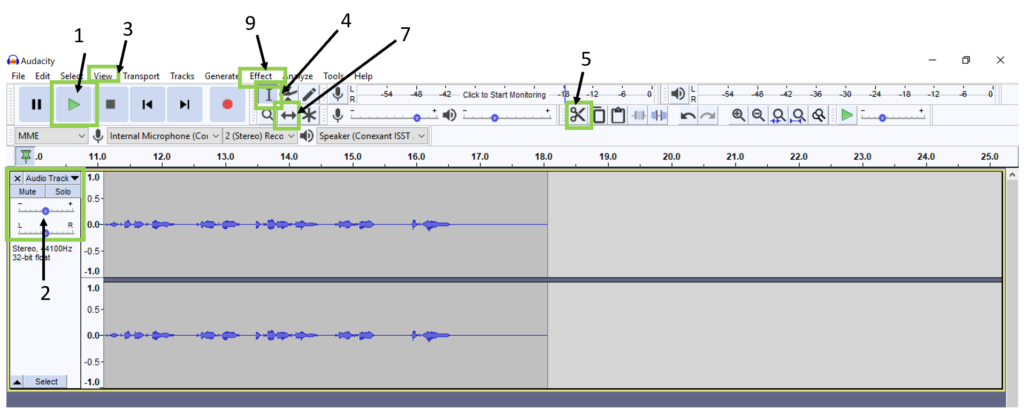
1. Play
Before you start going crazy deleting bits and moving things around, you probably want to hear how it sounds. There are a couple of tricks to this: you can use the space bar instead of the controls along the top to start and stop playing; when you go to start again, the programme will pick up from where you were last. If you want to go back to the start, click on the ‘0.0’ at the top of the screen.
2. Volume
You can adjust the volume (“Gain” to those in the biz) of individual tracks using the controls on the panel on the left. This is particularly useful once you start adding sound effects and music, as you don’t want them to dominate. You can also mute a track once you have a few more added if you want to focus on one.
3. Zoom in/out
Editing is fiddly, so it helps if you can see all the little bumps that you want to remove. Go to View>Zoom>Zoom In. You can do this several times to keep making it bigger.
4. Selection
This little guy is what you use to highlight sections to make changes to (e.g. cut). Make sure you have selected it.
Then highlight the section you want to add an effect to. (Beware: this is all he does, and he can be a right pain if you try to move sections around with him).
5. Cut
Once you’ve highlighted a section to cut, use the scissors to remove it.
6. Split Track:
If you want to add a pause for a breath or sound effect, CTRL+I will make a split in the track (as seen as a vertical black line in the image below) and you can then move it along.
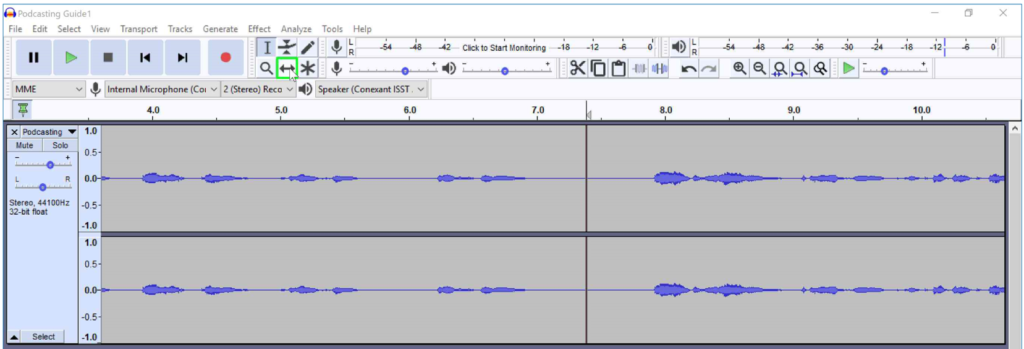
7. Move Track
Use the double arrow tool to pick up your track and move it around. Make sure you have selected it first, then move it to where you want it.
Warning: Don’t do too much of this before you add your music and sound effects because you will probably want to have at least some time of just music and/or sound effects for your intro. In this case, you will have to move your audio track along so it starts after the music and it’s a real pain to move each section individually after you’ve spaced it out carefully.
8. Adding music and sound effects.
This is where your podcast really starts to come together. Adding music has a huge effect on the tone of the podcast, and sound effects bring it to life. My advice is to plan exactly what sound effects you want and where you want to put them before adding them.
This website is great for free sounds: http://soundbible.com/. You do have to know exactly what you want though, as you have to search for it. Each sound also has creative commons information, so you can include the right attribution in your credits.
Once you have chosen your sound effect, download it (WAV or MP3 is fine) save it somewhere obvious, and import it into Audacity as you did your audio.
For music, I like https://www.bensound.com/. It has a huge range of backing music, divided into genres. There are some that you have to pay for, but more than enough free ones to go with.
Again, choose your music, download it and save to your computer, then import into Audacity.
When you go to import your sound effects and music, Audacity will automatically add a new track for each. This is the easiest to begin with, as it keeps everything separate and you can layer it. Also, if you only want to work on one part of the podcast at a time (like music) you can mute the other tracks.
If you want to see all your tracks at the same time, go to View>Track Size>Fit to Height.
If your music track is much longer than your other tracks, Audacity will zoom out to fit it on the screen. Just go back to View> Zoom>Zoom In to get it back to a size you can work with.
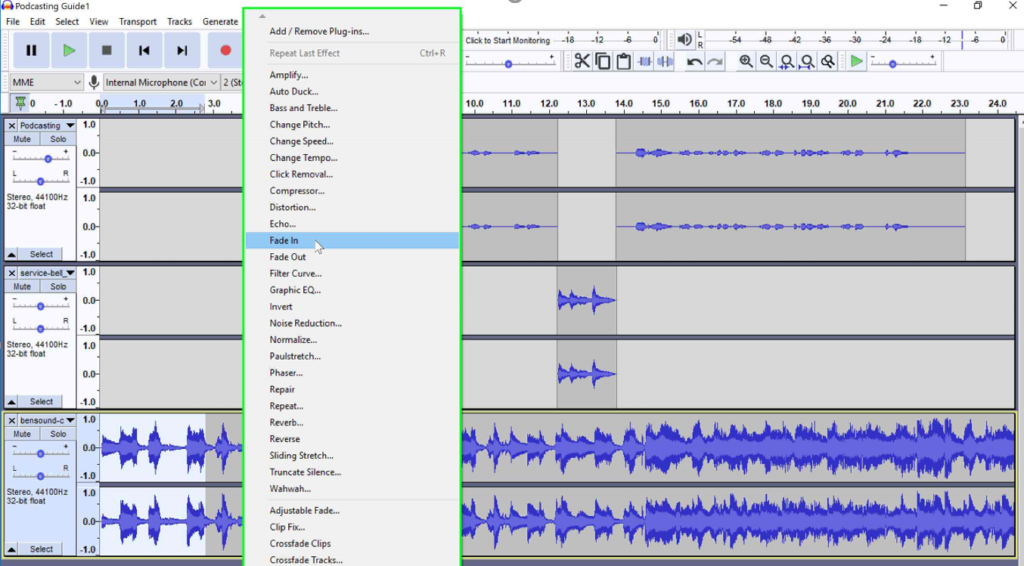
9. Effects
Audacity has a whole lot of effects that you can add to your podcast to make it sound even more awesome. The Help section explains them all in detail and gives clear instructions for how they work. My favourite is Fade In/Fade Out for music at the beginning and end of a section. Use the selection tool to highlight the section you want to fade in:
Then use Effect>Fade In to apply it.
10. Save and Export
This probably isn’t going to be an all-in-one-go project, so you’ll want to save it as you go. Go to File>Save Project>Save Project As…
This will generate this warning:

What this means is that you have only saved the work you are doing, not something you can share with other people. When you’re ready to show off your finished product, go to File>Export>Export as MP3 or WAV
As per usual, choose an obvious name for it and an obvious place to save it, and you’re done!
Last Word:
Podcasting is an excellent and accessible way to share a story. It does take a lot of patience and some getting used to, so take it easy and don’t be hard on yourself if you don’t get the hang of it straight away. Plan well before you start so you don’t get stuck halfway through having to move EVERYTHING because you wanted one more sound effect. Try something simple to begin with, like reciting your favourite poem and adding some music and sound effects. Most importantly, have some fun with it!
Do you have a question or an idea to share? Contact me.